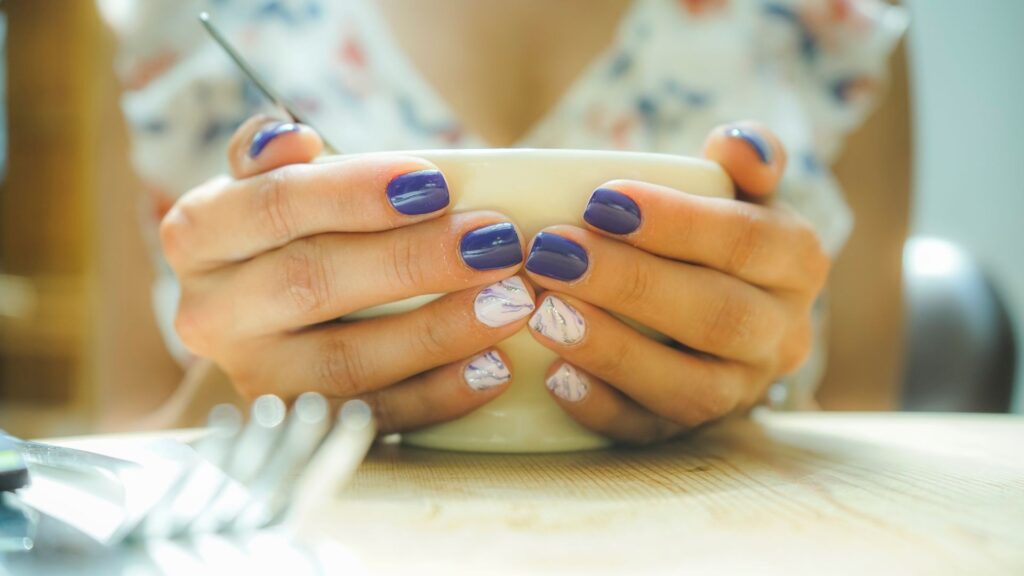
Marble nails recreate the swirled, veined look of natural stone using two or more polish shades blended directly on the nail. The classic version pairs white and gray. But 2026’s take stretches the technique into nude, milky, and chrome finishes, giving marble nails a softer, more wearable range than the trend’s dramatic reputation suggests.
This is usually the section that most tutorials tend to leave out. If you look up marble nails, what you will probably see over and over again is the usual black and white swirl, styled for photography purposes. No one seems to be mentioning anything about using the same technique with a more calming palette. Let’s fix that.
What Actually Makes a Manicure “Marble”
Marble nails are not one specific nail design, but a process. You mix two to three nail polish colors together and apply them to the nail or onto the palette before brushing them into thin lines. Every nail is unique, and that is the whole idea. The imperfection is what sells the illusion of real stone.
You can do this with regular polish, gel, or gel manicure systems, and each gives a slightly different finish. Gel holds the fine lines better and keeps them crisp for longer. Regular polish dries faster mid-blend, which can work in your favor if you’re going for a looser, more abstract vein pattern.
The color combination is really what decides whether your manicure reads as bold statement piece or quiet, everyday polish. That’s where things get interesting.
Nude Marble Nails: The Quiet Version of a Loud Trend
If you already lean toward nude nails for work or everyday wear, nude marble gives you a way to add texture without adding color. Pair a warm beige base with a slightly darker taupe or a whisper of cream, then blend thin veins across one or two accent nails.
The effect is subtle. When seen from a distance, it appears as any other nice neutral manicure with texture. Up close, the marbling becomes evident. This combination is precisely what made nude marble manicures so popular for weddings, interviews, and everywhere you want to have your hands looking polished but not distracting.
Here comes another tip which will make an essential difference: the contrast between your colors should be minimal. Too much contrast (deep brown over light ivory) would make your design too tortoiseshell-like, and not marbled. Stick within a few shades of each other for that soft, natural stone effect.
Milky Marble Nails: Where Two Trends Collide
Milky white nails have had their moment for a while now, and marbling gives the look a second life. Instead of a flat, opaque milky finish, you blend a sheer white base with the faintest gray or silver veining. The result looks almost translucent, like the manicure equivalent of frosted glass with a hint of stone underneath.
It is also more difficult to do at home than the nude marbling technique. The milky nail polish is usually quite sheer and hence the veining might smudge or spread if the base coat does not have enough time to settle. Let the base dry for one more minute after placing it under the UV lamp. You will notice a difference once you begin painting your marble design.
If you’ve struggled with streaky results on plain milky polish before, marbling actually forgives some of that unevenness. The veining gives your eye somewhere else to land, so minor streaks blend into the design instead of standing out.
Chrome Marble Nails: The Statement Option
For anyone who wants marble nails to actually announce themselves, pairing the technique with chrome nails is the move. You marble your base colors first, let them fully cure, then apply chrome powder or chrome polish over just the veined lines, not the whole nail.
This mirror finish reflects light across the marble pattern rather than over it; so, you have a level of depth and dimension that cannot be achieved through matte or conventional gloss finishes. The process may take a while, but it’s one of the most attractive variations of the trend right now.
The chrome marble has a tendency to look better in pictures than it does when viewed directly because of its reflective quality. This is something that you should consider when choosing it for events where there will be many people taking photos.
Classic Black-and-White Marble Still Has a Place
None of this means that the original black and white marble design is obsolete. It’s not. In fact, it remains the most identifiable incarnation of the trend, and it looks truly unique when done on almond or coffin-shaped nails, where the extended nail beds give the veining more room to move.
If you’re going classic, make sure you avoid applying the marble design to the whole nail. One accent nail or marble applied only to the ring fingers of both hands will look more thoughtful than an entire manicure. It also cuts your application time roughly in half, which matters if you’re doing this yourself.
Getting the Shape Right
Marble nails work on pretty much any length or shape, but some silhouettes show off the veining better than others. Rounder shapes tend to compress the pattern, so the marbling can look busier than intended. Longer, more tapered nail shapes give the veins room to stretch, which is closer to how marble actually looks in stone form.
If you’re working with shorter nails, don’t skip the trend. Just simplify. Use two colors instead of three, and keep the veining to thinner, more delicate lines rather than bold swirls.
How Long It Actually Lasts
Marble nail art holds up better under gel than under regular polish, mainly because gel resists the everyday chipping that erases fine detail fast. If you want your marble manicure to last, pairing the design with a durable builder gel base gives the underlying nail more strength, so the art on top stays intact longer instead of chipping at the tips first.
Realistically, expect two to three weeks of good-looking wear with gel, and closer to five to seven days with regular polish before the fine lines start to blur at the edges.
When It’s Time to Take It Off
Because marble designs usually involve gel or a gel topcoat to protect the fine detail, don’t pick at it when you’re ready for a change. Picking gel polish off pulls layers of your natural nail with it, which is how nails end up thin and weak. Follow a proper gel removal process instead, soaking rather than peeling, so your nails are in good shape for whatever design comes next.
Common Marble Mistakes That Ruin the Effect
A few small errors show up again and again in DIY marble attempts, and they’re easy to fix once you know what to look for.
Using too many colors. Three shades is the practical limit. Add a fourth and the pattern stops looking like stone and starts looking cluttered. Real marble reads as elegant because the veining is sparse, not busy.
Skipping the base coat cure. Marbling directly onto a wet or half-cured base is the single biggest cause of muddy, blended-together veins instead of crisp lines. Always let your base color set fully before you introduce the second and third shades.
Overworking the design. It’s tempting to keep adjusting the veins until they look “perfect,” but marble is supposed to look organic. The more you drag your brush back and forth, the more the colors blend into a flat wash instead of distinct lines. Two or three confident strokes usually beat ten fussy ones.
Forgetting the top coat. Marbling sits right on the surface of the nail, which means it’s more exposed to wear than a solid color. A thick, glossy top coat isn’t optional here. It’s what keeps the fine detail from wearing away within the first few days.
Products Worth Having on Hand
You won’t need a professional set-up to practice this technique at home, but there are certain things that will make your job a lot easier. You’ll need a thin detail brush that isn’t your usual polish brush, since it is necessary for creating fine veining. As an emergency measure, a dotting tool or a toothpick might do the trick.
Sheer or jelly polish mixes a lot better than opaque polish, and that is one of the reasons why milky marble looks so great. If you’re working with gel polish, then a blooming gel or any other type of thinning agent will help keep the colors fluid enough to work with.
None of this requires a big investment. A basic three-color starter set and one good detail brush cover almost every variation described above.
The Bottom Line
Marble nails have outgrown the single black-and-white look most people picture when they hear the word. Nude marble gives you texture without noise. Milky marble blends two current trends into something softer than either alone. Chrome marble turns the same technique into a full statement. And the original still holds up when you want something timeless. The technique is the same across every version. What changes is the palette, and that’s really the only decision left to make.